Building & Deploying WordPress to WP Engine with Bitbucket Pipelines
Since the introduction of Pipelines to Bitbucket, we have been eager to use this functionality where possible, with the goal of making a third-party deployment tools such as DeployBot, redundant.
This post outlines how The Code Company are now using Bitbucket Pipelines to automate our Build and Deploy releases through to the WP Engine platform. We have simplified some of the process for the sake of the article, but should give you an idea of the flexibility and things you can do.
This approach allows us to do our tests and builds with tools like SASS or Grunt in the cloud and avoid committing build files (like minified CSS or JS) which makes life easier when multiple developers are working on the same project.
Step 1. Enable Bitbucket Pipelines
Enable Pipelines for your Bitbucket repo via the pipelines item in the left menu.
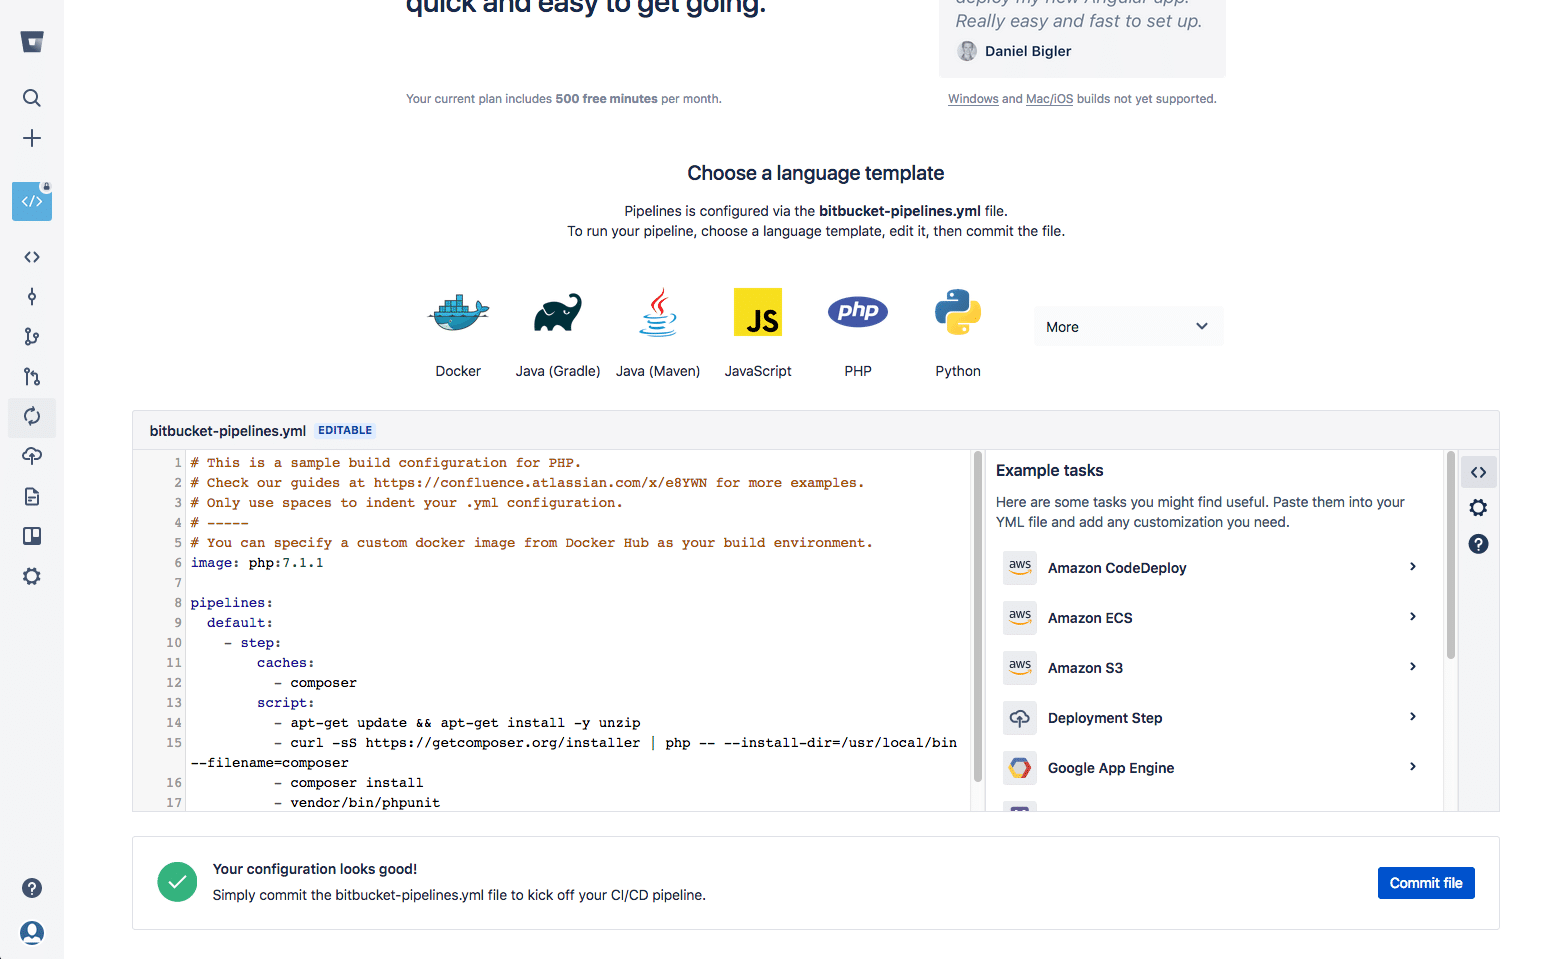
Select PHP as the language template and commit the default Yaml file.
Step 2. SSH key set up
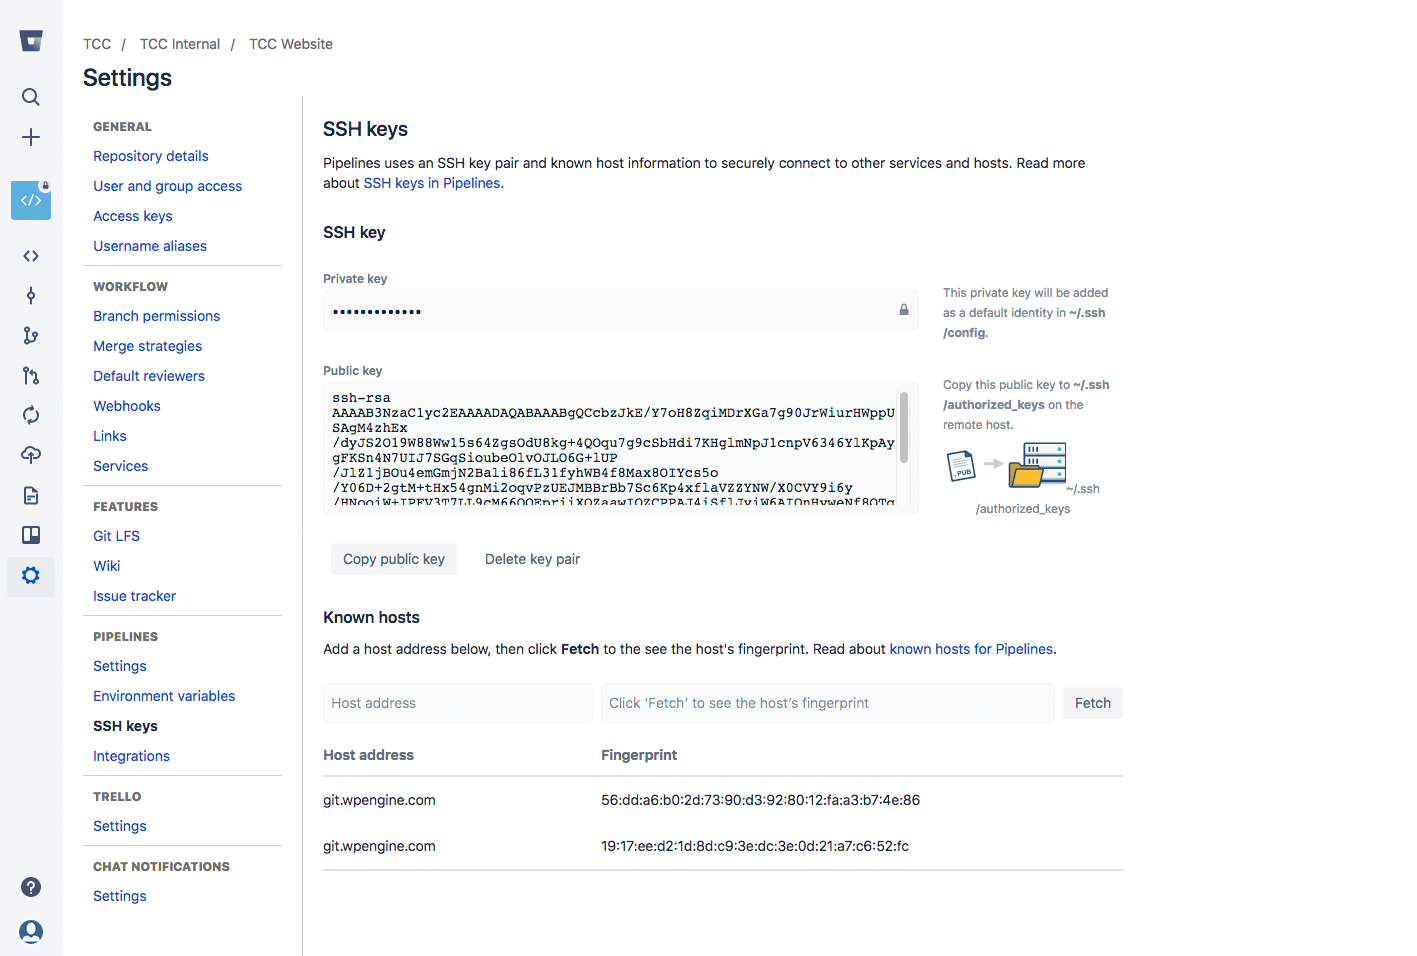
Generate ssh keys for Pipelines under Settings > Pipelines > SSH Keys in Bitbucket.
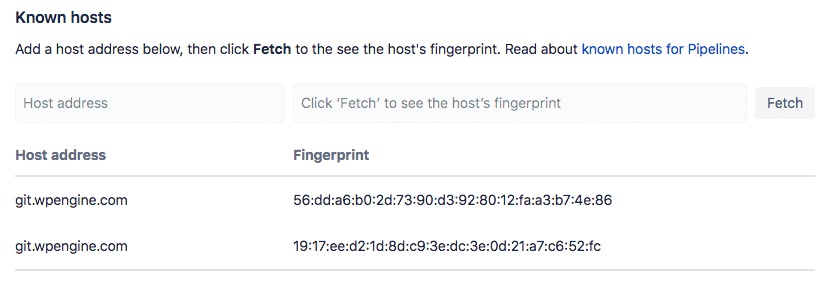
Under Known Hosts on the same SSH Keys settings page, add git.wpengine.com, as per –
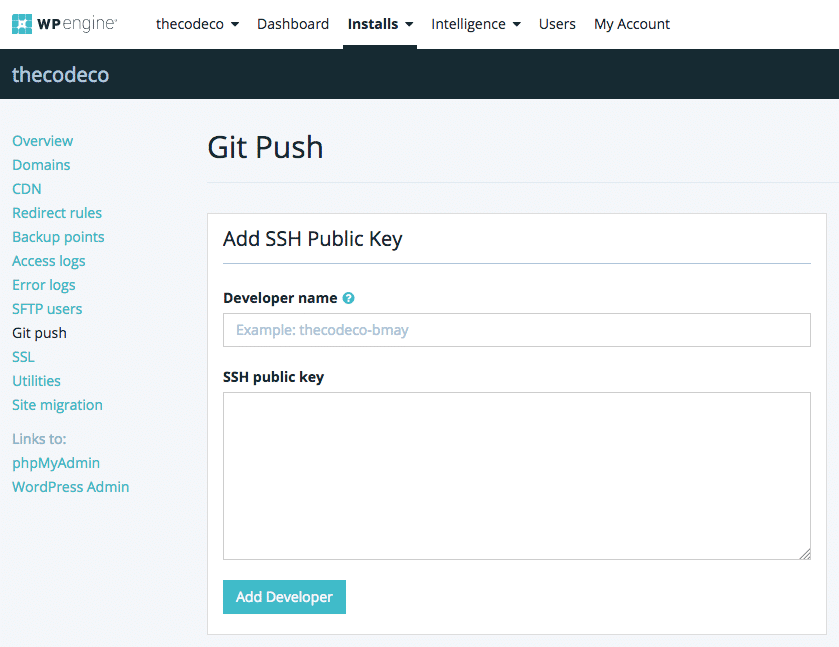
Step 3. Add SSH keys to WP Engine
On the WP Engine User Portal (my.wpengine.com) click Git Push in the left side menu.
Copy the SSH key set up in step 2 and add the SSH key, as per
Step 4. Set up Pipelines deploy
Edit your bitbucket-pipelines.yml file and update it with this template, replacing the git endpoints for your project:
image: thecodeco/pipelines

pipelines:
  branches:
	master:

    	- step:
        	name: DEPLOY PROD
        	deployment: production
        	caches:
          	  - node
          	  - composer
        	script:

          	# RUN FRONTEND BUILD
          	- npm install
          	- composer install

          	# REMOVE GIT FROM BUILD DIR SO WE CAN PIPE TO WPENGINE'S GIT
          	- rm -rf .git

          	# ADD FAKE USER DETAILS, OTHERWISE GIT COMPLAINS
          	- git config --global user.email "team+pipelines@thecode.co"
          	- git config --global user.name "Pipelines"

          	# COMMIT THE COMPLETED BUILD ARTEFACT TO WPENGINE'S GIT
          	- cd .. && git clone git@git.wpengine.com:production/YOUR_SITE.git deploy/
          	- cd deploy/ && rsync -avzq --delete $BITBUCKET_CLONE_DIR/ . && cd ..
          	- git add . && git commit -m 'deploy'
          	- git push origin master
This can be expanded to also work for staging environments. You would create a new step for the staging branch, copying the script for production and tweaking. Example: bitbucket-pipelines.yml
This uses a custom Docker image we created, which has a useful stack for PHP builds, including composer & NPM etc.
You can use any image on hub.docker.com (e.g. could use a vanilla PHP image like php:7.1.1), more details here.
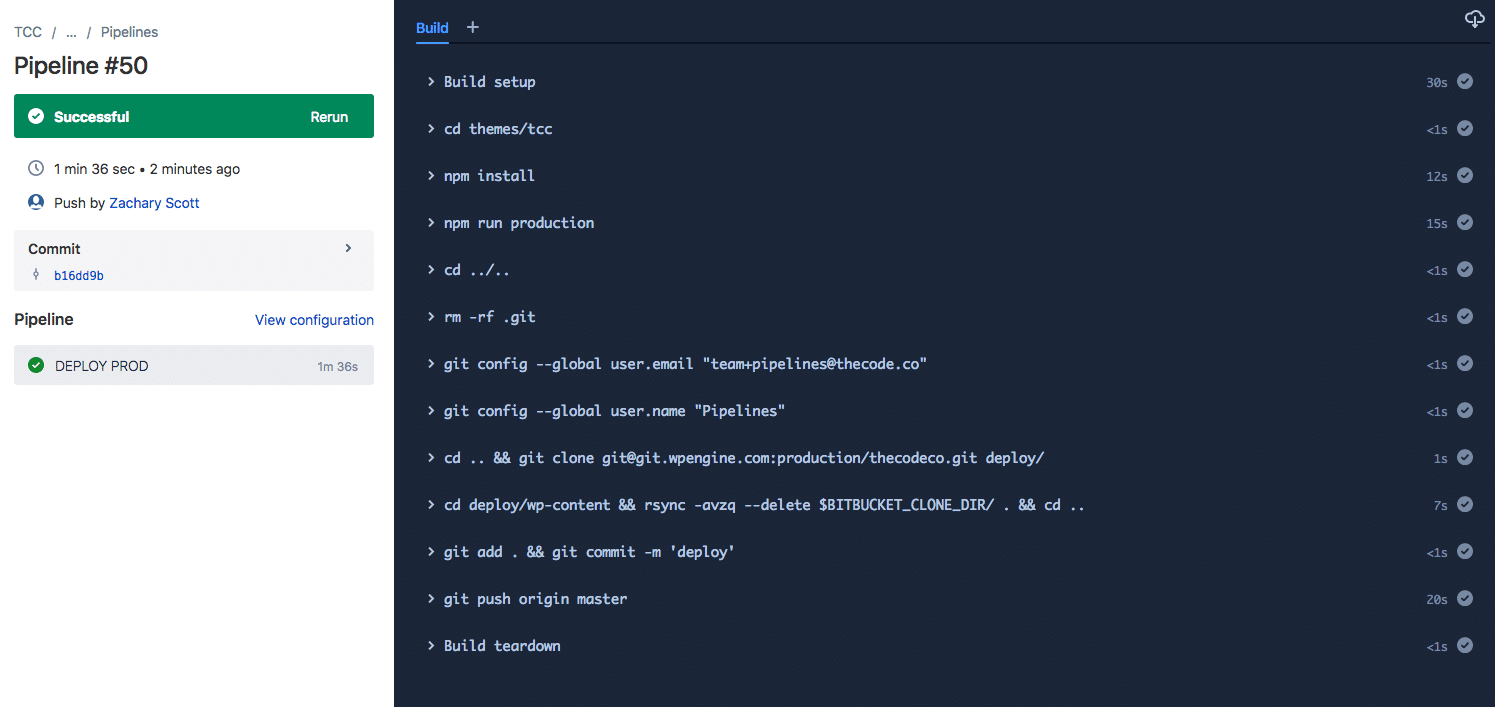
If all goes well, the build should complete like this – and that’s it!